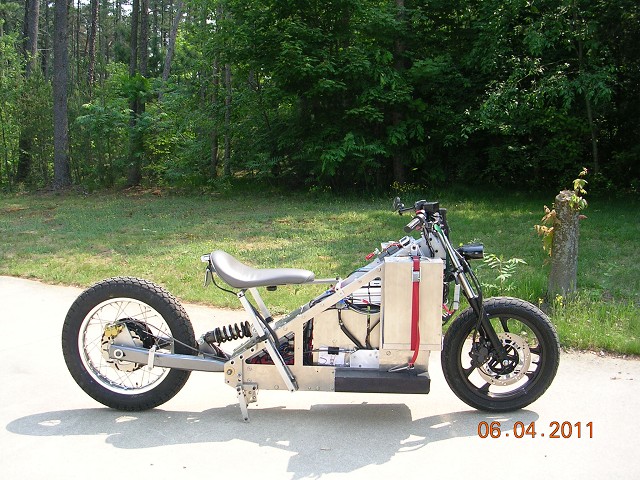
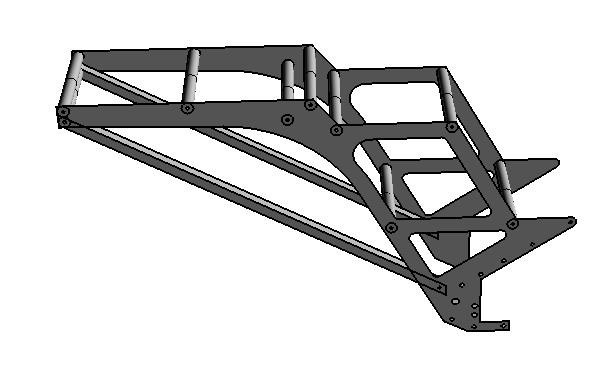
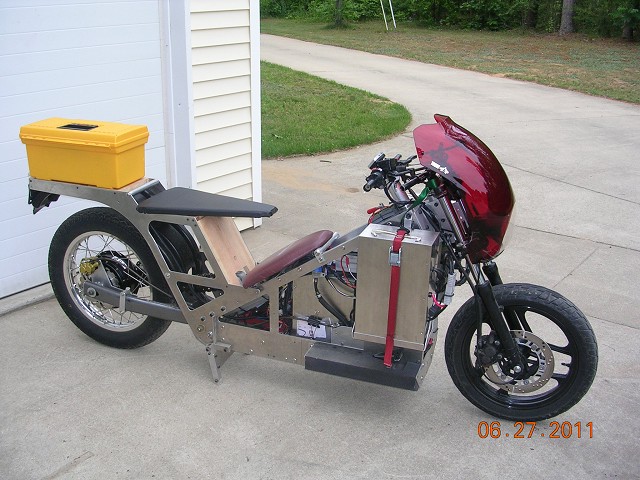
Neat thing about a modular bike, you can just bolt on things to totally change the bike. Here is a picture of the bike as a Bobber, a picture of the rear frame concept, and a picture of the bike with the rear frame bolted on.

How much energy can aerodynamics save? Here is a real world example. I pulled in close behind a cement truck going 55mph for a few miles and watched my energy usage plummet to less than 1/2 of normal.
The energy consumed to maintain 50mph while drafting the truck was 2,310 Watts.
The energy normally consumed to maintain 50mph is 5,250 Watts.
Will the Rifle-Vetter full body fairing give this much improvement in Aerodynamics? There is only one way to find out, and we're working on it!
Kraig joined the Side Stand Up Internet Radio Show to talk about our electric motorcycle entry in the Vetter Challenge. Starting at 1:33 in this edition of the weekly show, you can hear Craig Vetter, Fred Hayes, Charlie Perethian and Kraig Schultz (1:55) talk about their projects.
June 7, 2011 Side Stand Up Radio Show: http://itunes.apple.com/podcast/side-stand-up/id271086304
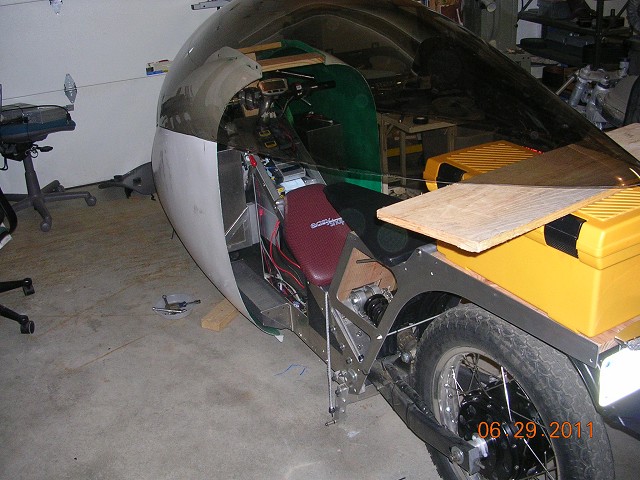
Built and installed the two-position seat. Installed an inner rear fender-well and got the Rifle Vetter Fairing off the shelf for a test fitting. Lots of work to do to get it chopped and mounted, but it's nice to see it will all fit inside.
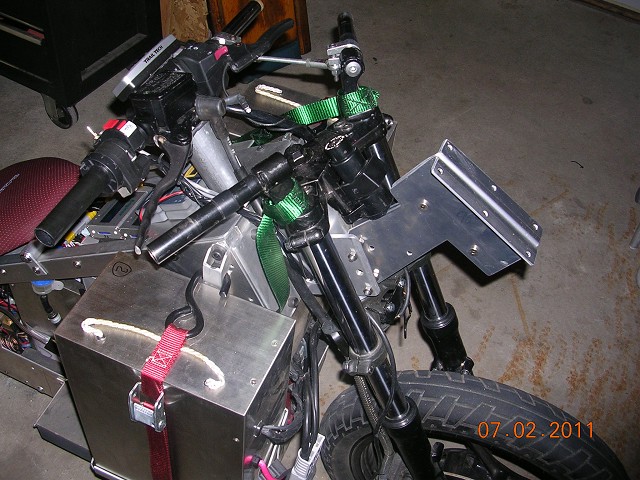
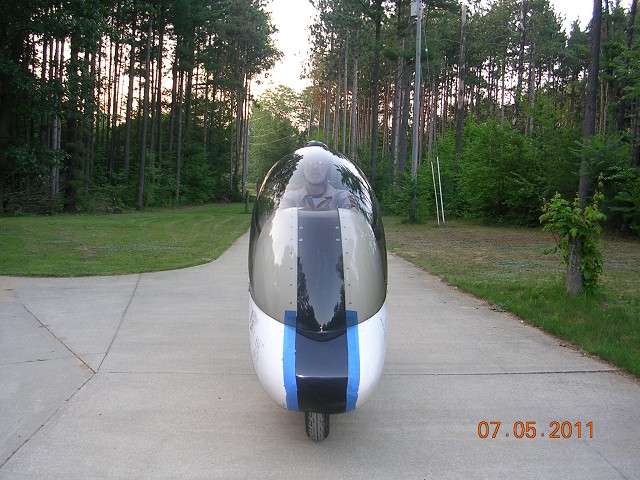
Here is a picture of the remote steering needed to allow rider to ride INSIDE the bike.
Well, the remote steering is working fine, so we went on some longer rides at 37mph. This is the speed we've chosen to test at because it is full throttle for 1st gear (using the throttle lock to lock the throttle wide open). We can't go full throttle in 2nd gear for testing yet because that would be over the speed limit and would be drawing more current than we want to draw to complete the Vetter challenge. So, as we add aerodynamic improvements we will be able to go faster for the same amount of juice.
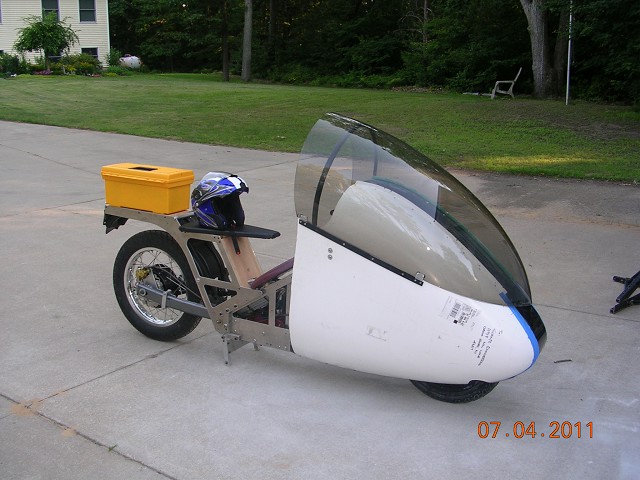
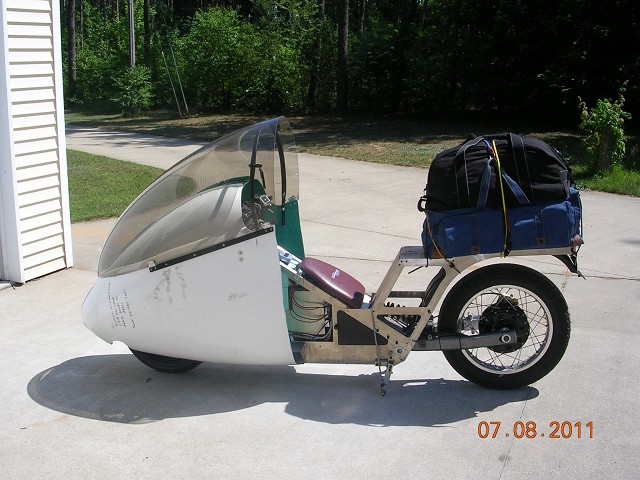
For now, we are test riding with the bike in quite an ugly state with a large yellow tool box to carry chargers and gear and to help make us visible as we ride along at 37mph holding up traffic.
Kraig did several 40+ mile runs this weekend. The bike is consistently using 75-85 Wh/Mile at 37 mph outfitted as shown in the picture below. So, by the numbers, the range of the bike to 70% depth of discharge at 37mph is 75 miles without a body. The bike is very comfortable to ride in the reclined position and is stable as a rock. Going no handed is no problem and it's easy to steer by leaning or just sticking a hand out to make it drift one way or another. The red windshield actually increased the air drag about 3%.
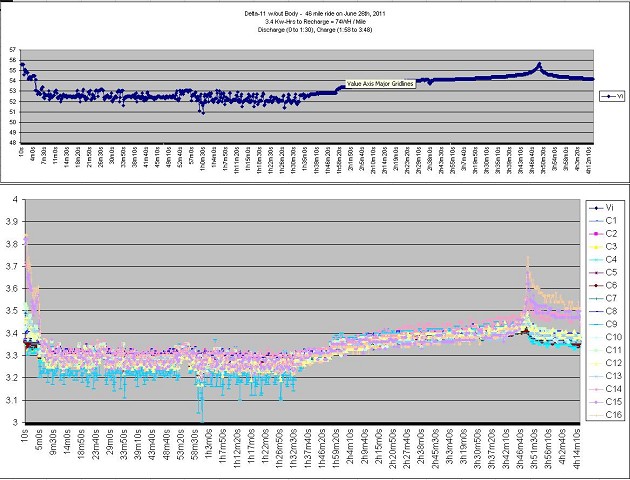
The Enginer BMS units have a nice data logging feature that records pack and cell voltages every 10 seconds on an SD card. There are two sets of battery packs on the bike. This chart shows data from just one pack for 1 discharge and recharge cycle. This was our first chance to practically understand charge/discharge curves and charging/balancing/protection strategies for Li Iron Phosphate batteries.
There are two Lithium Iron Phosphate battery packs on the bike. Each battery pack has 16 cells of 3.3 volts (16 cells x 3.3v x 2 packs = 105 volts total) . The charts below reflect data from one of the packs for one ride and recharge cycle. The top chart is the battery pack total voltage. The bottom chart is the voltage of each of the 16 cells that makes up the internal battery pack. Cell 9 is the cell that is consistently logged on the low side.
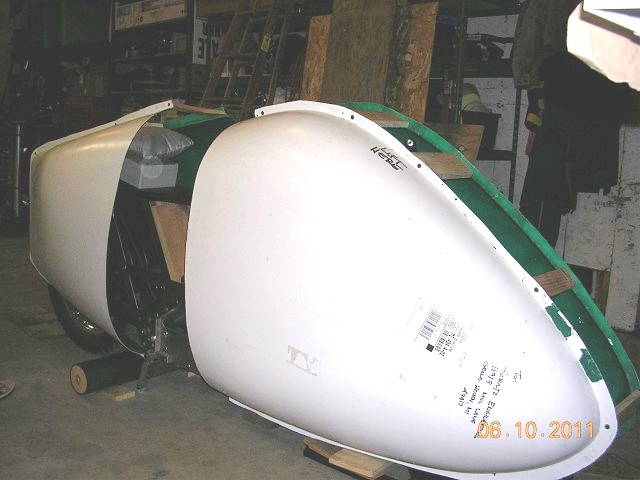
Working on mounting brackets for the fairing. Did a test fit for the RV-8 Canopy (from www.ToddsCanopies.com) that will be chopped for the windshield and rear end...
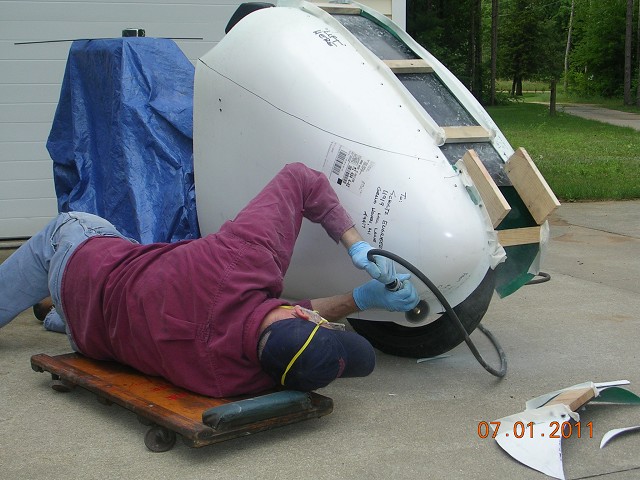
Shaping the clearance hole for the front wheel. Spent the weekend working on mounting the fairing, inner fender, and windshield. Also, worked on remote steering issues, and steering locks.
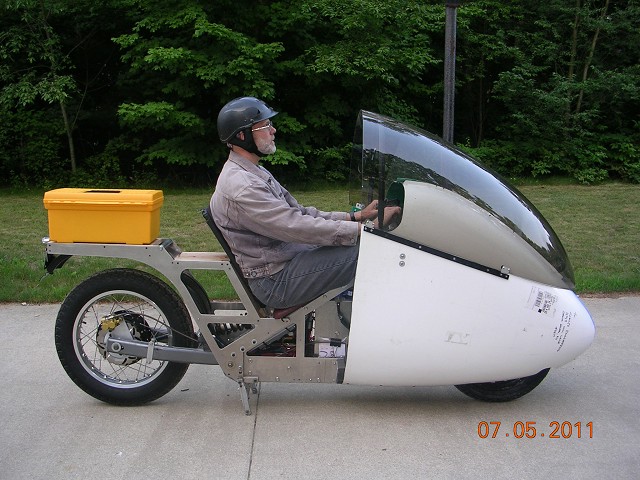
We know it's not visually attractive, but the good news is that the FIRST ride with this fairing matched our previous all time best efficiency performance of our Electric Honda125 Dustbin bike. This is significant because this new bike is heavier, larger and has yet to get a tail, wheel dishes, sides, etc. But, most importantly, we were sitting in a reclined, comfortable position with no wind in our face or upper body. Highly efficient AND comfortable!
NUMBERS:
37mph = 1,696 watts (27% improvement over naked bike)
50mph = 3,675 watts (30% improvement over naked bike)
Top Speed (with controller current limited to 80amps) easily increased from 56mph naked to 66mph with fairing nose!
This gives the bike a theoretical range of 75 miles at 50mph. This is still not good enough (to complete the Vetter Challenge e.g. 110 miles at up to 70 mph), but a very encouraging step in the right direction.
Notes on riding: NO wind on helmet, upper body. Bike is stable and level - the fairing/windshield is not causing the bike to lean, tilt or wander. Cross wind gusts are noticable and will need to be studied more.

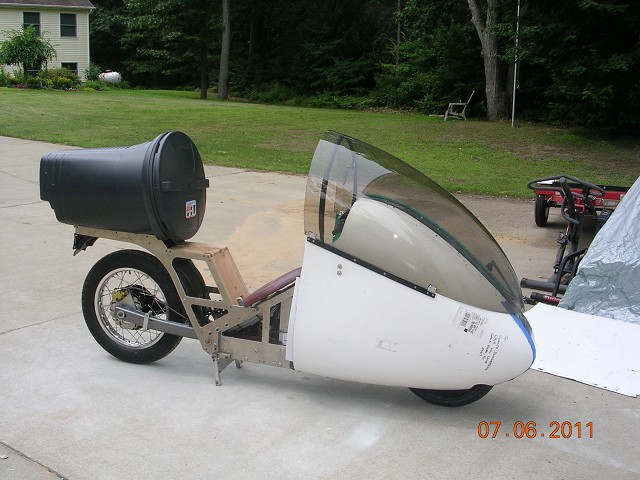
Putting together the tail and doing it right will take some serious time. Is there a shortcut? Is there a quick and dirty way to get storage capacity for 4 bags of groceries and aerodynamic improvements?
Here is an quick and dirty experiment using a trash can. Amaziningly, that large object made ABSOLUTELY NO DIFFERENCE! The bike with a big yellow toolbox, or the trash can or with nothing at all on the tail is exactly the same for aerodynamic drag!!! From a cargo hauling standpoint this is really good news. We should be able to build just about any shape back there and not make our drag worse.
Does this mean a good tail won't make a difference? No. A good tail should keep the air flowing smoothly from the front and should IMPROVE AERODYNAMICS. More to come...
Jan. 2015 Note: See work being done by Alan Smith and Craig Vetter on making a larger tail http://www.craigvetter.com/pages/2015-Streamliner-pages/2015-Tuft-Testing-p83.html
I was working furiously trying to get a tail on the bike before the Mid-Ohio Fuel Economy Challenge. I'd pulled out all stops (investing all my time and money into the project), and needed a bike that could go 100 miles at 55mph to win the event. Without a tail, I knew it couldn't be done. Here are some quotes from e-mails I wrote around that time.
July 7, 1pm: "We talked about tails the other day. I have run out of time for getting a good tail on my bike before the event (I will be at Summer camp with my Boy Scouts all next week), but I did some last ditch experimentation today. Read below for details...
July 7- E-mail: "Egads! Is that a trash can strapped to the back of your bike? I'm about out of time before the event to do anything major for the tail section, I only have 2 work days left to modify the bike, so I don't have time to build the tail right. The nose was supposed to have removable battery packs to allow for carrying 2 bags of groceries up front, that isn't done either.
So, since I need to have a way to carry four bags of groceries, I figured why not just go quick and dirty and see what happens? Maybe I'll stumble upon some mysterious truth or find a way to defy the laws of physics...I know this doesn't work, I've tried it before...But... Anyway, I took a trash can having the same diameter as the windshield is punching in the air and strapped it on. The result? I've done this before and here is the key learning: Motorcycle aerodynamics are so-o-o-o bad that you can do virtually anything you want to make the motorcycle more comfortable as long as you don't make it bigger than the hole you were making in the wind before. Are you cold in the wind? You can take a cardboard box and duct tape and make yourself a wind deflection apparatus. The end result, as long as you don't make a parachute is you will have not made the aerodynamic drag worse, and you will probably be more comfortable.
And the results are...ABSOLUTELY NO DIFFERENCE. The bike with a big yellow toolbox, or a trash can or with nothing at all on the tail is EXACTLY the same for aerodynamic drag!!! So, anybody out there who was worried about the Vetter Challenge 4 bag requirement, don't worry about it. Just bring a big duffle bag and lots of bungy cords and/or duct tape, maybe a little cardboard to smooth it out a little. You can attach those groceries to your bike just fine. Be careful, keep it balanced, keep it safe, but don't worry. Does this mean a good tail wouldn't make a difference? NO. A good tail must keep the air flowing perfectly smooth from the front. But building a good tail takes a lot of time and attention to detail, and there not a lot back there to attach it to...
Picture of Bike with Trash Can: http://www.schultzengineering.us/trashbin.jpg
July 7, 8pm: My Families Reaction to my last ditch efforts:
My wife walked into the workshop and gasped when she saw the trash can mounted on the bike. "What are you doing?" (It takes quite a bit to get a repsonse like that from her!).
I said, "You can't make progress unless you are working outside the box."
She said, "Well. We are certainly out of the box with this..." She was so struck by it that she sent my sons straight out to see what dad was working on...
She shouldn't be surprised. For goodness sakes, I've had myself shrinkwrapped to a bike before just to see if it would reduce drag... http://www.schultzengineering.us/areo2.html
July 7, 8pm e-mail: I've done some different experiments with sides and everything I've done increases sensivity to cross winds and hasn't reduced drag much. see www.schultzengineering.us/stripes.jpg For the road trip to Mid-Ohio I will probably go with the trash can because it gives me room for all my gear, protects it from rain, and gives me capacity for the groceries (no reason to be disqualified before the ride begins). I plan to strap my tent and sleeping mat one on each side of the tail just below the trash can.
Racing Stripes - Got Em. See www.schultzengineering.us/stripes.jpg This was done to clean up lines of trash can. Didn't help with drag, didn't help with looks much either...although it does seem to scare people a bit- maybe I put the stripes on the wrong way? It looks terrible, but time and money preclude the beautiful solution for the time being. When you strap everything on, it kind of gives it that MadMax look. On the other hand, I do have sponsers and potential customers to worry about. Maybe I'll have to go with a stylish and color coordianted toolbox? What would be really nice is to just pop out and grap a nice set of saddle bags. The best solution would be to have one of those really slick 1-wheeled aerodynamic trailers to haul the groceries in...oh well, dreaming again, I have no money.
I'm getting a little extra wind on the back of my neck and ears with the trash can that I didn't get without it, so I think it's just a bit too large in diameter. I looked at a bunch of other smaller trash cans, but all are either too small or didn't have a nice lid (but most have a really nice taper to them). If I'm going to fabricate something, I might as well do it right and use the pices of the Rifle-Vetter fairing I have. But, that will have to wait. I'm still learning the hard lessen that in the end it takes just as much time to do a half-ass job as it does to do it right the first time--the only difference is the quality of the end product. So, I'll be going to the event with a half finished bike!
July 7, 10pm E-mail from Warren Berger:
Kraig,
"And the results are...ABSOLUTELY NO DIFFERENCE. The bike with a big yellow toolbox, or a trash can or with nothing at all on the tail is EXACTLY the same for aerodynamic drag!!!
as long as you don't make it bigger than the hole you were making in the wind before"Exactly. The answer is counter-intuitive. Make the tail wider than your nose. Studies going back to NACA in the 30's show that the wake off a hemisphere is huge. To get it to reattach you want a streamlined shape behind you, with the widest part maybe 6" wider than your nose section.
Of course, the best solution is to enclose the bike from the nose all the way back to a point. But you could greatly reduce drag by making, basically, a fat vertical airfoil behind you. A simple flat sheet of plastic, as tall as your front fairing, pulled back into a crude airfoil shape, and stapled/taped where the edges join. Cut out enough of the leading edge to slide it down over the frame behind you. I think you would be amazed.
Warren
Hindsight looking back 3.5 years: Due to going back to work full-time, being broke financially, and being convinced by my experiments and data from others (i.e. Terry Hershner, Craig Vetter, Alan Smith) that no one knew what a proper tail should look like, I've still not put a tail on my Delta-11 bike. However, in January 2015, Alan Smith and Craig Vetter have begun experimenting with Warren's possible solution: making the tail LARGER than the nose. See Vetter's work on this: http://www.craigvetter.com/pages/2015-Streamliner-pages/2015-Tuft-Testing-p83.html
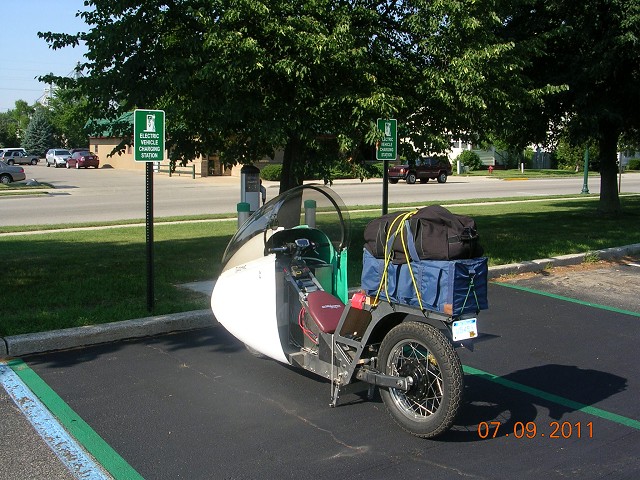
I consulted with my wife and we came up with a simple solution - bungy cord and some luggage. I'll put some inserts in them to make them rigid so I can get bread and eggs, but as pictured I can haul two full helmets and 4 bags of groceries. It all comes off easily to leave room for a passenger. Now, that is practical!
Oh yeah, how did it affect efficiency? Not much. Certainly less than 5%. Will they stay on there? Well, I recorded a new maximum top speed with the luggage on see picture below for result (68.4mph on flat and level with no wind).
And for those interested, the bike was pulling 75amps at 100.5 volts (7,537 watts) at 68.4mph with all that luggage on the back! (110 watt-hours per mile). That is 2x the raw power required to go 50mph with this bike, but since it is covering more ground it is "only" consuming 50% more energy per mile.
| Delta-11 Configuration |
Watt Hours Per Mile at 50mph |
MPGe |
Top Speed |
Range at 50mph |
| Naked bike (Bobber Style) | 133 |
250 |
57 mph |
28 miles |
| Naked Bike, riding in Feet Forward Posture | 96 |
350 |
60 mph |
46 miles |
| Front Streamlining only | 80 |
420 |
69 mph |
55 miles |
| Fully Streamlined | TBD |
800? |
70+ mph? |
100+ miles? |
On July 9th I did a 70 mile tour of Western Michigan (no recharging during the ride). I went down to Zeeland and Holland to look at all the new public charging stations that have been installed this year. Then I rode up to Grand Haven and cruised the beach. 56 miles were at 37mph speeds. 14 miles were at 50-65mph. This was the first public showing of the bike and response was awesome. I wrote ELECTRIC PROTOTYPE on the each side of the bike. People were drawn to it in parking lots and were asking all the right questions.
People were ESTATIC about the bike when I was riding it with them at 50-65mph in traffic. Huge thumbs ups and smiles and waving from all demographics. So, people are very happy to see the future. Most people have never seen an Electric vehicle that can keep up with traffic and were very surprised to see it done. I was surprised at how much fun it is to ride with the traffic and not have to worry about running out of juice.
The only people I get no reaction out of are the Harley Riders. They won't wave on the road, they seem to try to ignore the bike in a parking lot. I don't understand it, because some of the nicest people I know ride Harleys, but out on the road they are really click-ish.
The 4 bags of grocery storage capacity is really cool. It really opens up freedom for taking everything you want along with you on a ride. This ride, I stopped at several old friends houses, stopped at lots of places to check out charging spots, stopped for dinner and did a little shopping. I figure I rode 2 hours and was stopped for 2 hours. If were to plug in at each of my stops, I would have been able to go all day and never stop. I think from now on I will start planning my trips around using those charging stations more. This will encourage the people installing them and will greatly increase my effective range. Oh, did I mention all public charging stations in my area are FREE? That will increase my MPGe to near infinity!
Recharge took 2:45. Energy to recharge = 5.2 kWh. That is about a penny a mile for electricity. Makes it nice when people ask what "gas mileage" I get. I just say, what is gasoline price? Yesterday it was 375, so I was getting the equivilent of 375mpg.
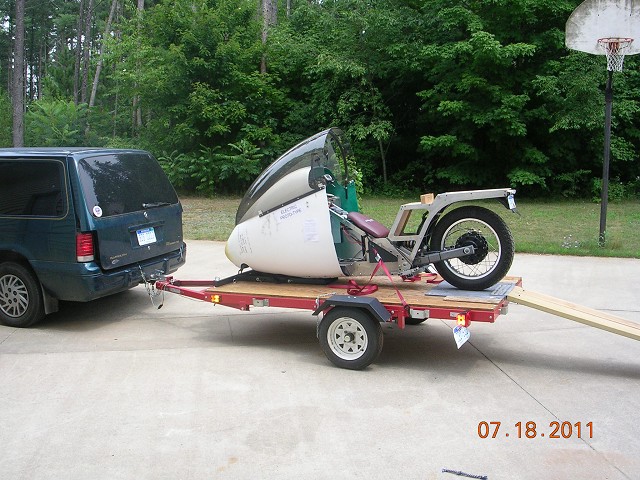
Working on some last minute changes before going to Mid-Ohio. One was to modify wheel stand on trailer to allow for the front fairing.
(Next Page)