|
CHAPTER 3 - DREAMS OUT OF THE DUSTBIN - Installing and testing a Dustbin Fairing |
10-1-08 Dustbin Fairing Arrives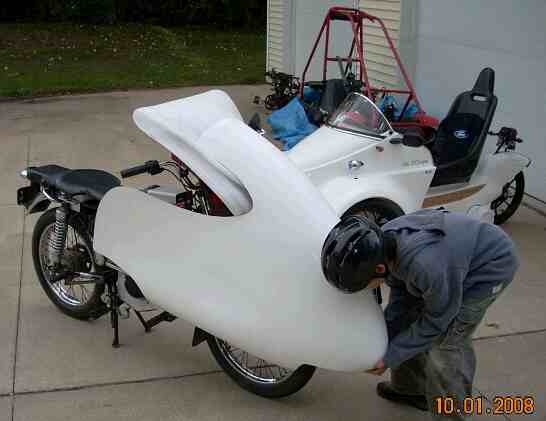 |
10-26-08 Handle bars inverted, making room for the dustbin fairing. Stay tuned, More to come... Current Odometer 4,466 (1,768 electrified miles).

|
|
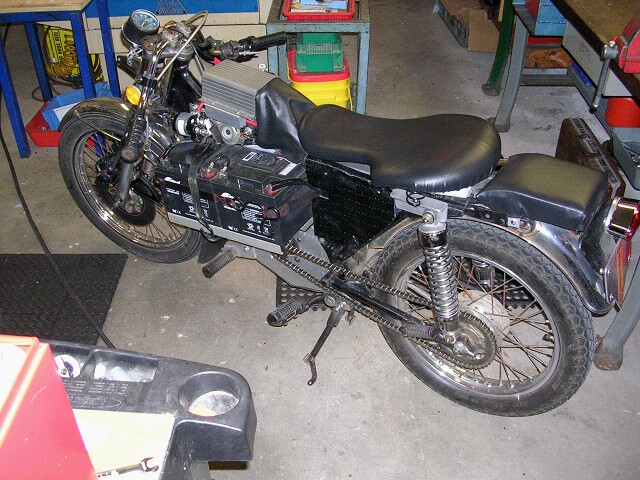
January 25, 2009 - Generation 2, starting point with Odometer 4,466 (1,768 electrified miles). I plan to make the bike faster, quicker and more energy efficient.
 |
I replaced the front wheel with used one from Ebay. The old rim had rusty spokes and the rim had a kink in it which wasted a lot of energy. Also, the tire was original as far as I could tell and weather checked. Amazing that it still held air and went 1,768 trouble free miles. I installed a narrower new tire, and I rolled both wheels on a straight line...they have a different circumferences so I will probably ditch the original cable driven speedo for a more efficient electronic pickup version. 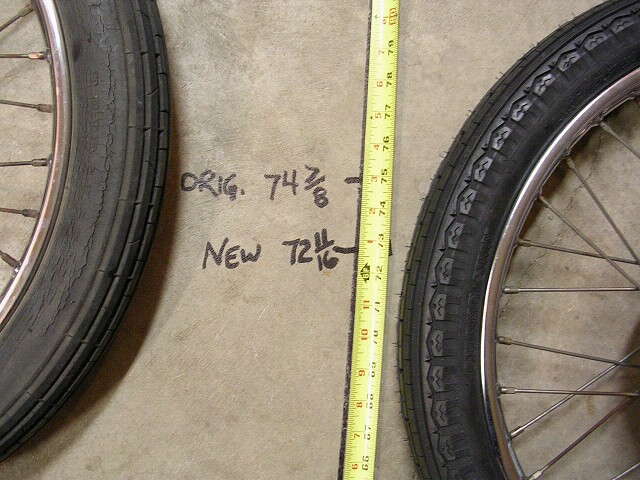
|
Feb. 14, 2009 - To go to 72 volts (Perm-132 requires Clockwise Rotation at 72volts) I had to swap my chain drive from left to right side of bike. Then switched my rear brake control from right side to left. For, mounting the dustbin fairing I used the battery box and triangulated supports to build support points.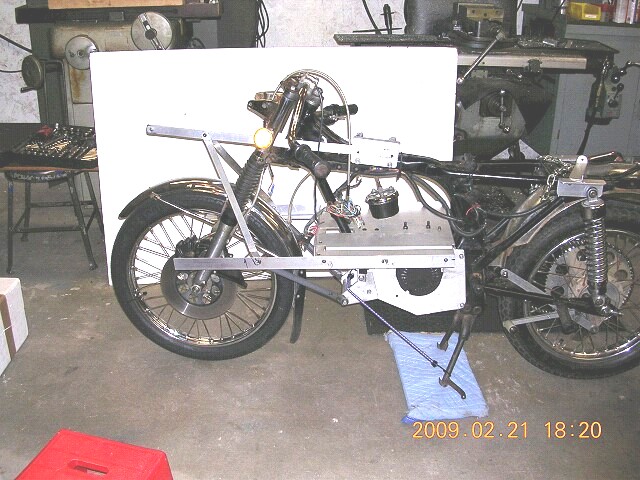
|
Feb 22, 2008 - Fairing mounted. It's surprisingly rigid. I'm able to tuck way down into it (my knees and forelegs get inside the fairing, I grab the inside of the handle bars to get my arms inside the air stream). Can't wait till the snow clears so I can take it for a spin.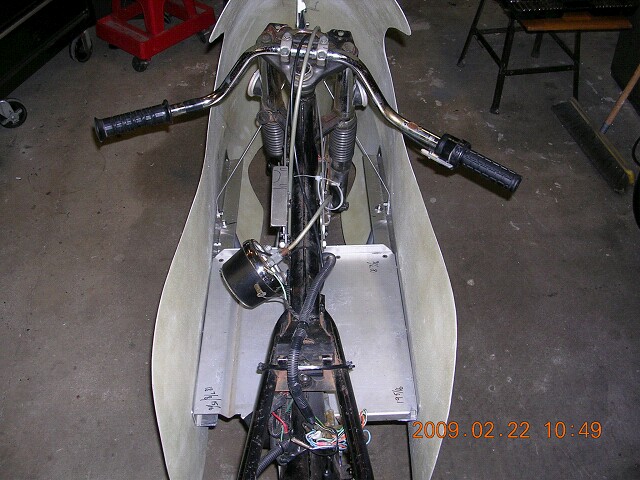 |
Feb 28, 2008 - First rolling test with dustbin fairing. Steering lock to lock not enough, can't control it at low speed because can't turn front wheel enough to balance the bike. My 19" front wheel and fender are too large for the fairing. But, otherwise I'm able to tuck into the fairing nicely...The fairing weighs 9 pounds without any bracing. 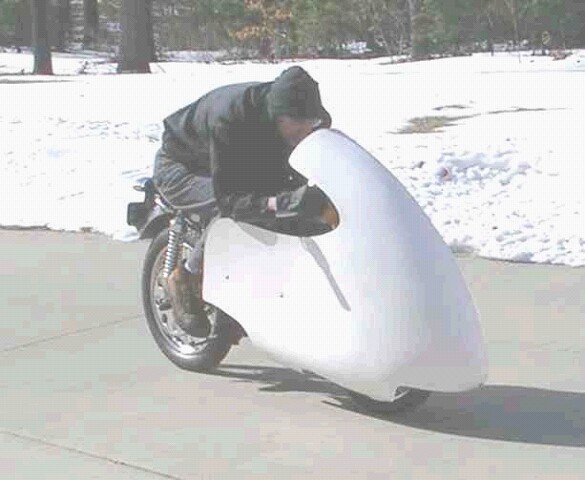  |
Feb 28, 2008 - 16" Moped wheel from my BugE fits nicely into fairing. Low speed maneuvering is MUCH better, but still not perfect. 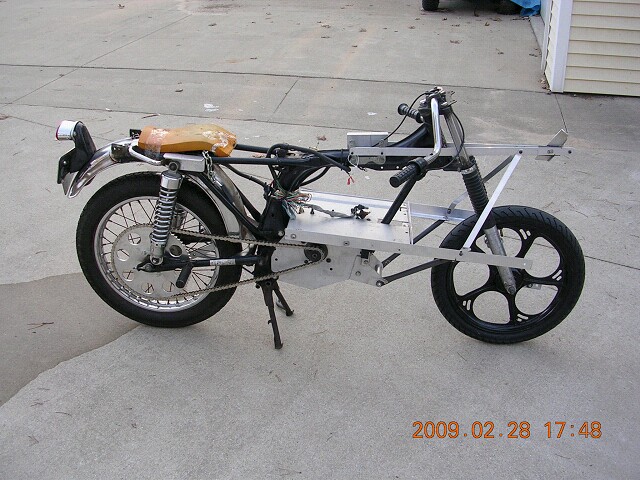 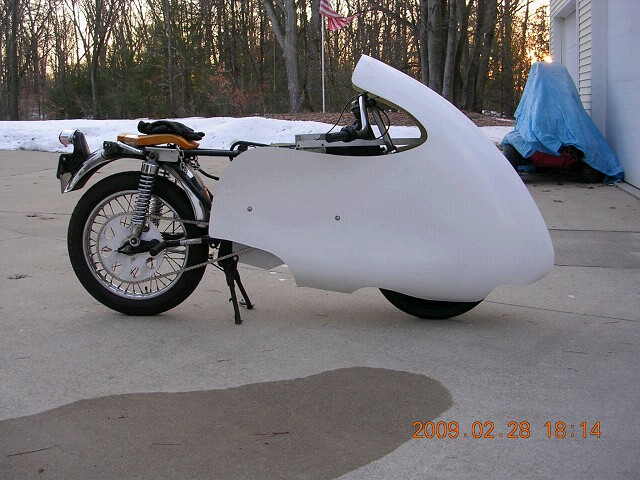 |
March 5, 2009 I've finally got the steering all tweaked for good manuverability by using a spoked 16 x 2.5 moped wheel and raising the fairing a bit. 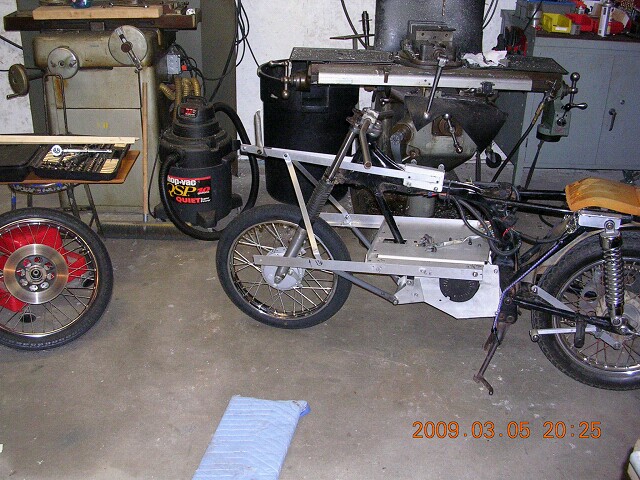 |
March 6, 2009, Wiring mess. I'm going to mount this stuff on a modular plate to avoid this disaster everytime I take it apart! 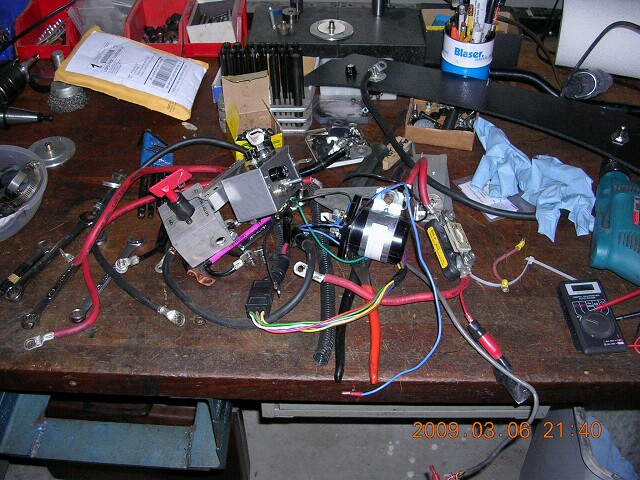 |
March 8, 2009 Concept for mounting wiring with four, 20 Amp-hour batteries mounted wide (with covers over wiring and batteries) and to the front giving lots of knee space... 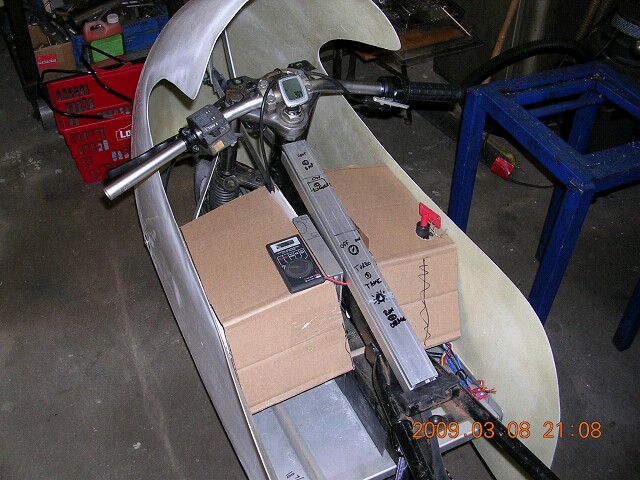 |
March 20, 2009 Wiring in better shape and modular (everything is mounted on plates so if I disconnect 2 battery cables and 2 motor cables and remove 3 bolts the entire control system including switches lifts off the bike). Unfortunately, one of my 20amp-hour batteries is shot, so I had to put my large batteries back in there...so, I lost most of my knee space. 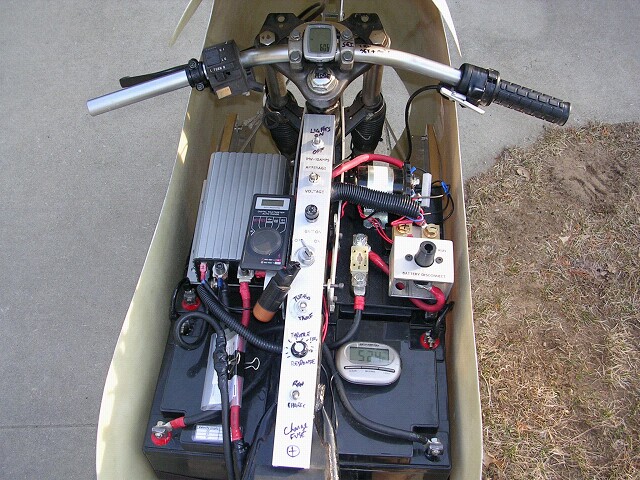 |
March 21, 2009 - The circuit diagram below shows how I am able to measure battery voltage and amp draw with one gage. This is the first time I've been able to measure amp draw real time and I love it! 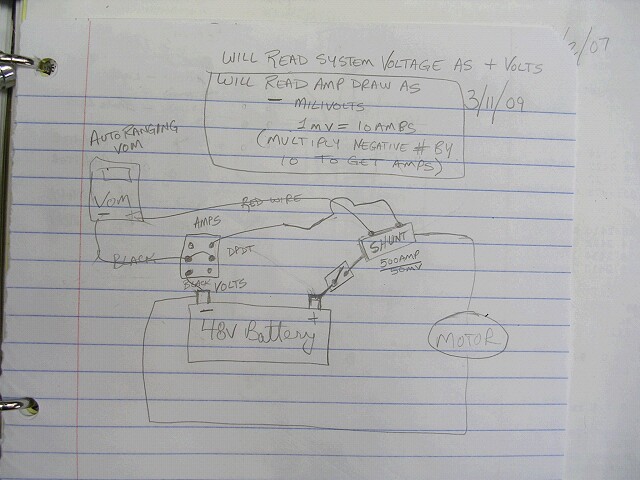 |
|
March 21, 2009 - FIRST TEST RIDES WITH DUSTBIN. I tried different tuck positions with and without the dustbin fairing. I am ranging from 21 amps to 30 amps at 28 mph on the flat (at 48 volts). The fairing is quite loud - it has quite a rumble to it. The new maximum speed (at 48volts) with 12:70 gear ratio is 31.6 mph. So, acceleration is great, but top speed is limited. It's an quick little moped! 0-32mph in 5-6 seconds. Click here for a quicktime video of bike in action - note: the chain was rubbing rear spring making lots of extra noise, but still the bike is much louder with the fairing...Here is a Quicktime video of it in action. 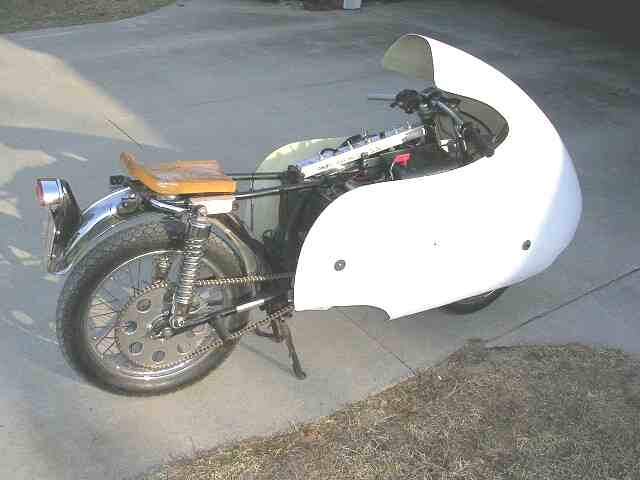 |
|
April, 2009 - I installed a rear view camera system to eliminate exterior mirrors. It mounted easily and was cheap ($90) but did not work well. The camera mounted nicely under the tail-light, but was a wide angle and while it worked good for stuff within 12 feet of rear of bike, but it was impossible to see cars 1/4 mile away. So I removed the camera and went with a $5 handlebar mounted mirror instead.  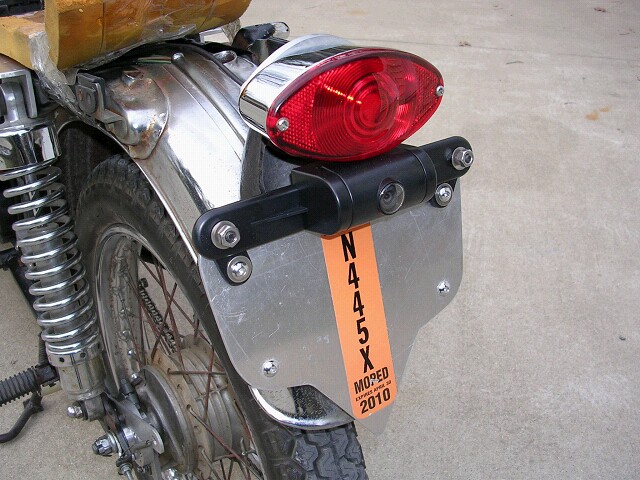 |
|
April 2009 - Low Cost Controller Protection Methods Two things that are bad for your motor controller are high in-rush current (not giving the pre-charge resistor time to precharge the capacitors in the controller) and having your controller on when the batteries are being charged. The picture below shows how I have fixed these two issues with just a few dollars and minutes of wiring. HIGH IN-RUSH CURRENT: I installed a large green LED to indicate my main disconnect switch is on and that my motor controller capacitors are charged and that my system is live. My start-up procedure is to turn on my main power switch, wait for my Green LED light to come on (about 5-10 seconds), then turn on my ignition key switch, which energizes the high current loop. The reason the LED doesn't come on until the capacitors are charged, is because this LED is powered by the 12V circuit, which is powered by the 48-12v voltage converted. The voltage converter doesn't turn on until system voltage is around 40 volts. When the main disconnect switch is turned on voltage bleeds through the pre-charge resistor to gradually charge the capacitors in the motor controller. (You can watch this voltage rise happening if you have a voltage meter hooked up to the + and - terminals of the motor controller). Once the voltage is about 40 volts the voltage converter turns on and the LED light which is wired to the 12 volt circuit comes on. So, really the system power light is really indicating the 12V system is active. CHARGING WITH CONTROLLER ON: In the picture below you can see the red-colored-disconnect-switch-key has a string on it. The string makes it so the key doesn't get lost, but more importantly, the string is pulled straight accross my Anderson connector where my home charger plugs in when the switch is on. The on-board charger also has a connection wire that is tied to this string. So, the key must be turned off in order for either chargers to be connected to the system. This simple prevention device is sometimes referred to as a Poka-Yoke or mistake-proofing. 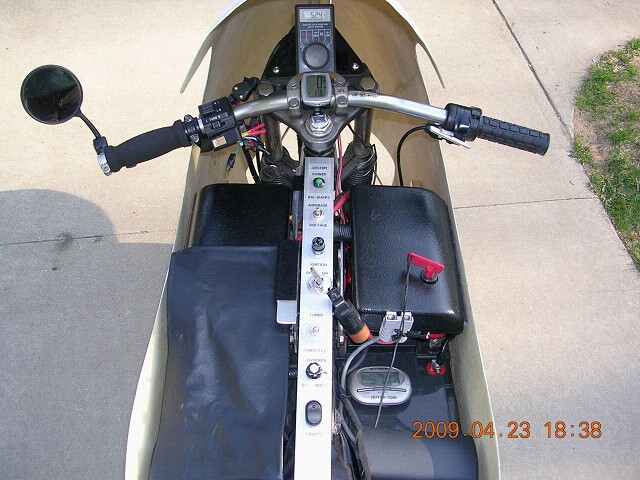 |
|
April 2009 - Spreading the Word I printed some signage for the dustbin using bumpersticker media from Office Max. I sprayed them with a clear lacquer to make them more durable and rain resistant. 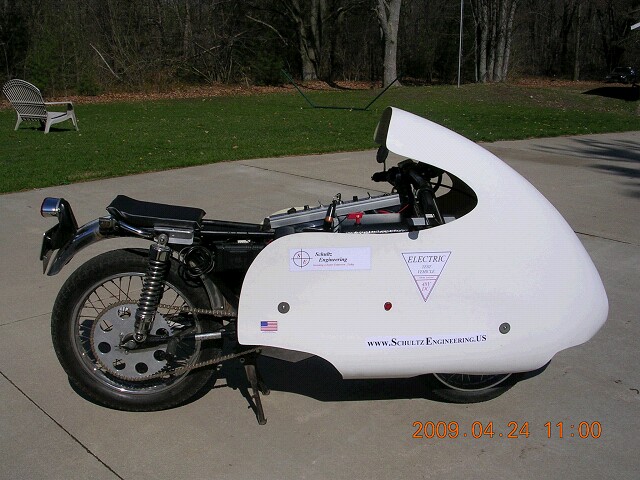 |
|
May 2, 2009 - Red Fairing Plus Dustbin. I taped the Red fairing onto the dustbin to make a windshield and a possible place for a headlight. The energy draw improvement was incredible. On flat and steady in tucked position at 28mph: without red fairing I draw 22 amps with red fairing I draw 18 amps   On Flat and steady in untucked postion at 28mph: without red fairing I draw 26 amps with red fairing I draw 21 amps 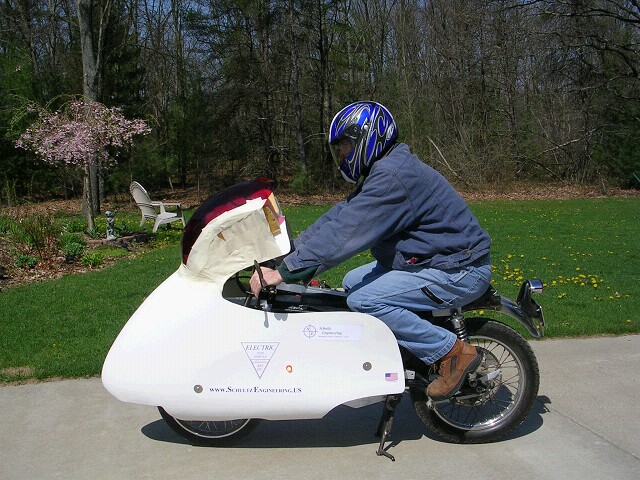 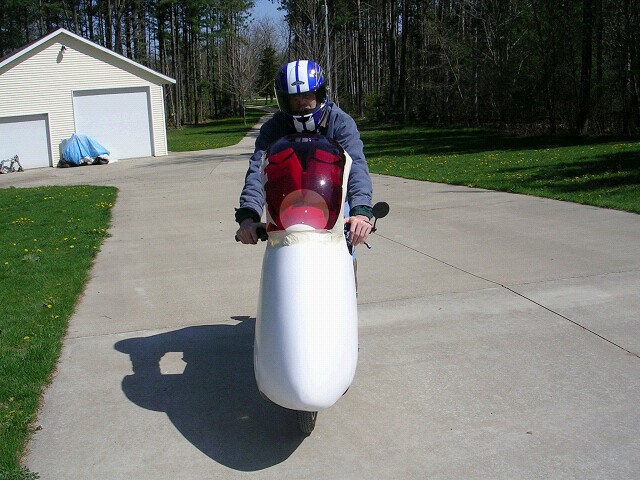 |
|
May 31, 2009 - In mid-May I clocked a new max speed with DUSTBIN only (w/out red fairing) of 59.7mph. It was a windy day and the CROSS wind was tossing me around a fair bit (as we feared the dustbin would) but it was a fun ride. This was with 30:70 drive ratio. I made some threaded connection points for the red fairing so I can quickly take it on and off from the Dustbin. In this tucked position, I am able to cruise at 28mph drawing 18 amps (900 watts!!!). And with a t-shirt on at 15 to 16 amps. See the chart below for energy usage at various speeds. 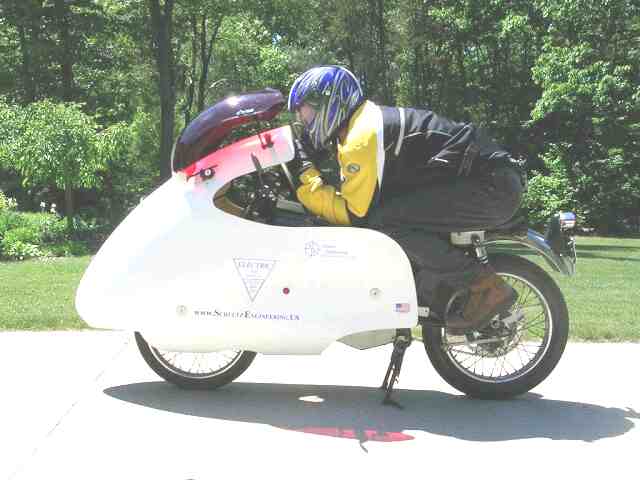 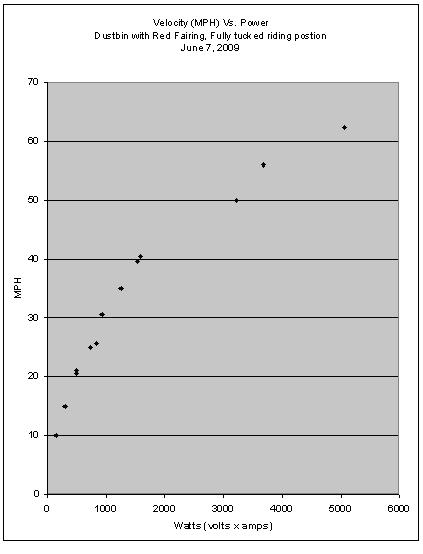 |
|
June 7, 2009 - NEW MAX SPEED and LOW COST PACK-TRACKER This week, I mounted headlights under the red fairing and installed a poor-mans-pack-tracker. The poor-mans-pack-tracker is a 6 position rotary switch and allows viewing amp draw, pack voltage and individual battery voltage with one autoranging meter. This picture also documents the breaking of the 60mph barrier (finally!). If you look at the speedo you can see a new the max speed is 62.3mph. This was done on the flat with 30:70 drive ratio. Acceleration was poor and this kind of speed is totally battery sucking as I was drawing around 100-110 amps while doing it. |
|
(Next Chapter - Building Community) |
|
This webpage was written by Kraig D. Schultz. Copyright 2009-2010, Schultz Engineering, LLC |