Steering Modifications - December 2008
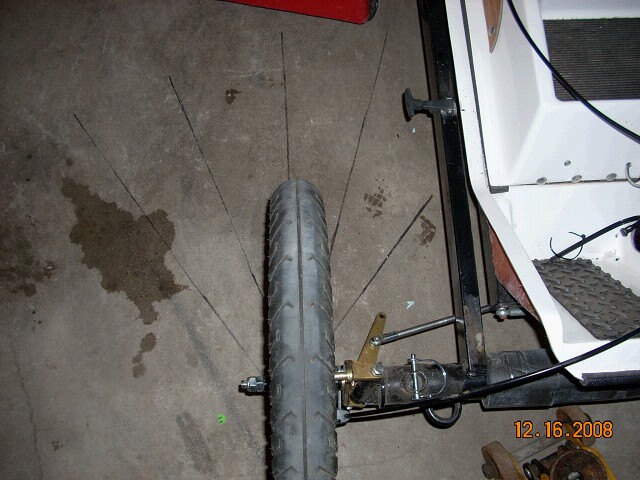
In the picture above, the lines drawn on the floor show the major difference in wheel angle possible by using the different holes in the control arms.
With the tie rods connected to the outer holes on the steering arms, the steering behaves nicely on the BugE. The steering is not fussy, and it goes straight down the road. You can drive one handed or even let go of the handle bars and not worry about going out of control. I would like the turning radius to be better, so I am trying the inner hole in the control arms to see how twitchy the steering becomes. July 2009 note: Inner holes work fine for steering.
I've had some problems with the tie rods bending (the 1/4-20 threaded rod tie rods kept bending at the exact spot the rod end connected)...this is what happens when you let your kids drive your experimental vehicle!!!...so, I made some new tie rods out of 7/16" diameter steel and we'll see what happens.
Brake Modifications - December 29, 2008
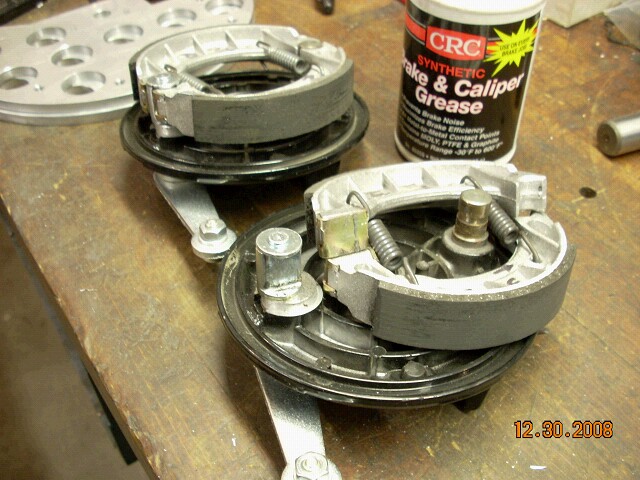
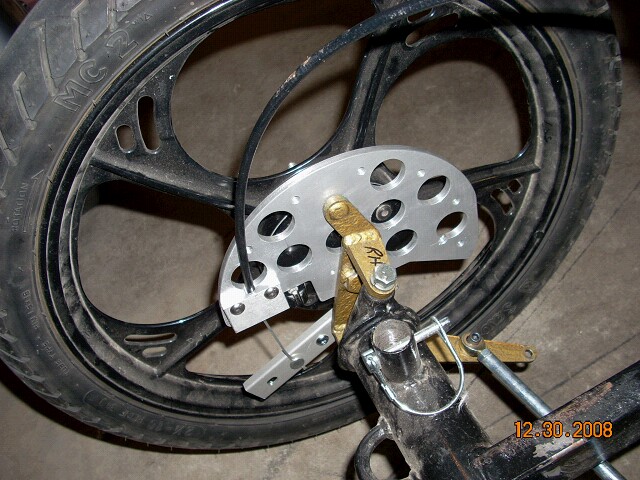
The BugE has cable-operated, drum brakes (Tomas Moped Wheels) all around and I'd like to improve the braking of the vehicle.
Lubricating the brake cam:
The cam driving the shoes had no lubricant and the metal was starting to fret, so I sanded off the damaged metal with 600 grit and applied a tiny little bit of brake grease to the cam before putting it back together. This smoothed out the movement a lot. I'm tempted to replace the spring closest to the cam with one having a little less strength to help reduce activation force.
Longer Lever Arms:
Taking a que from Nap Pepin , I made some brake arm extensions to increase my leverage.

I made two sets of holes to experiment with leverage. The first set will give 50% more leverage than stock and the second set will give 100% more leverage. The trade off is travel distance and I hope to remedy this problem by purchasing or making a mechanism simular to the BRAKE DIRECTOR.
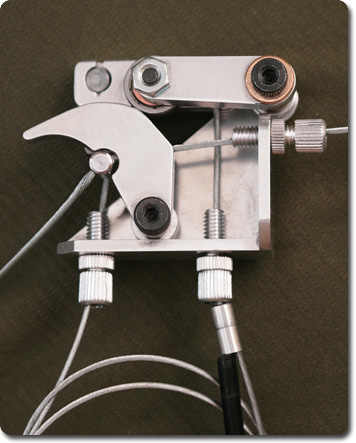
The Brake Director has a cam action that takes up the air gap quickly and then gives mechanical advantage for the rest of the stroke. An added benefit of using a device like the Brake Director is that it consolidates the two front brakes into one lever and balances the force between them. With luck, this will eliminate the excitement of brake steer caused by having independent levers for the right and left front brakes. This will also allow me to put the rear brake on the other handle bar lever. Just adding the rear wheel to the dynamic braking of the vehicle should give me 20-30% shorter stopping distances...
January 2009: Fender Support and Extended Brake Arm Support Bracket:
Since I am planning to make custom fenders that cover the entire top half of the front wheels (aerodynamic note: since the top half of the wheel is going in the opposite direction as the vehicle, this results in the top portion of the wheel having TWICE the relative velocity to ambient air as the rest of the vehicle), I CNC'd some aluminum brackets with threaded holes on the periphery to attach the fender to. I also am planning to put dishes on the rims to help calm the turbulence from the spokes and reduce air pumping inside the fender...
Since I am planning to make custom fenders that cover the entire top half of the front wheels (aerodynamic note: since the top half of the wheel is going in the opposite direction as the vehicle, this results in the top portion of the wheel having TWICE the relative velocity to ambient air as the rest of the vehicle), I CNC'd some aluminum brackets with threaded holes on the periphery to attach the fender to. I also am planning to put dishes on the rims to help calm the turbulence from the spokes and reduce air pumping inside the fender...
Road Testing The Brakes: July 4, 2009
By mounting my brake levers at the very end of the handlebars I am able to get more lever travel and have much better stopping ability. I can now lock up the front wheels during a panic stop. In fact, I measured the following panic stopping distances on dry asphalt today:
30mph - 0 mph stopping distance is 42 feet.
40mph - 0 mph stopping distance is 77 feet.
Sadly, my 1993 Dodge Grand Caravan (non ABS) performed better with a 30mph - 0mph stopping distance of 39 feet.