|
CHAPTER 1 - FROM THE JUNK YARD TO THE ROAD |
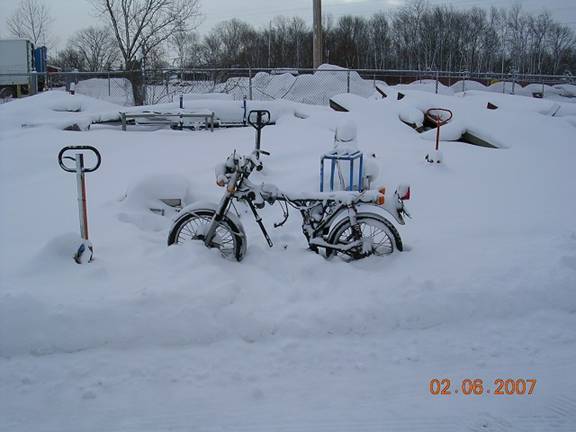 Frame as I found it in junk yard (2-6-07) I purchased rolling chassis for $10 at local scrap recycling yard on February 6, 2007. This 1975 Honda CB125 was last licensed for road use in 1981. It had 2,698 miles showing on odometer. How many years did it sit neglected in someones back yard? What happened to its engine and transmission? The most important question I should have been asking at this point was, DOES IT HAVE A CLEAR TITLE? If the bike hadn't had a clear title, I could have ended up with ownership issues after the bike was built. So, one of the first steps in any electric vehicle build process is to get a clean title on the donor bike. If your donor bike doesn't have a title, take the serial number on the frame to the local police station and have them do a search to see if the vehicle is listed as stolen. Then, process the paperwork to get a title for the vehicle before investing a penny more into the build. All major components of the bike will need to be accounted for when attempting to register the bike for a title (e.g. engine, frame, forks, wheels, seat, etc.), so keep your reciepts! Rebuilding this junk bike was the most time-consuming part of the project. I traded a lot of hours for the money I "saved". Hindsight is that it might have been better to start with a running or even a new motorcycle from a total "cost" and timing stand-point. July 2009 note: It is becoming common practice for people to purchase completely functional late model I.C.E. motorcycles, remove and sell the extra gasoline components on E-Bay and thereby start their electric motorcycle projects with an effectively free donor bike. On the positive side, I got to completely disassemble and re-build the bike (you don't really own it if you haven't taken it apart to see how it works)... and for an electric bike you don't want bearings or brakes that are binding or wasting energy, so replacing/tuning them up is a good first step to building an efficient vehicle. |
 With snow dusted off. |
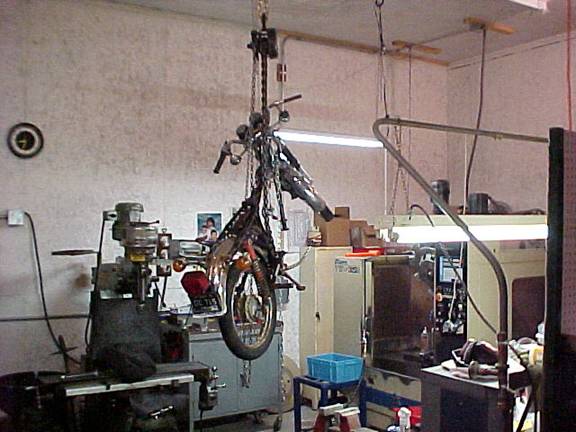 Finally, a use for that overhead winch! Actually, it worked great to lift the bike to the height convenient for the area I was working on. I had calculated that the bike should do at least 65 miles per hour with my proposed drive system, so I wanted to make sure the brakes and bearings were in good shape. This lead me to the decision to give the bike an overhaul. I purchased a service manual and borrowed one from the local library and started taking it apart. |
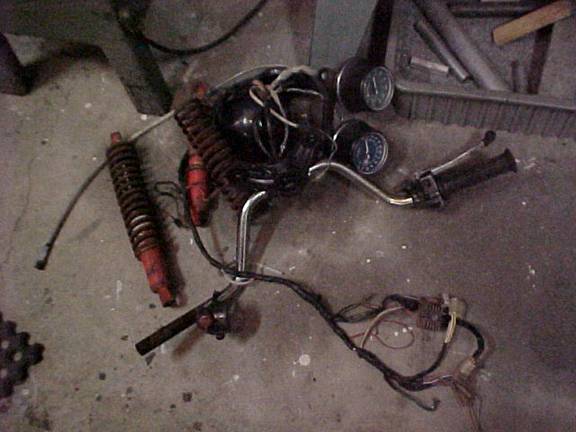 Pieces |
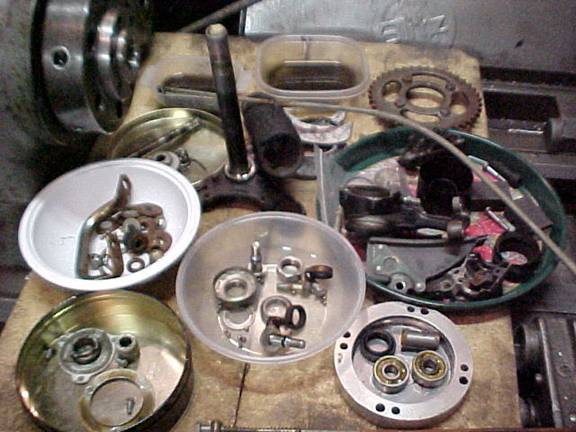 And parts (Bearings and miscellaneous brake parts) |
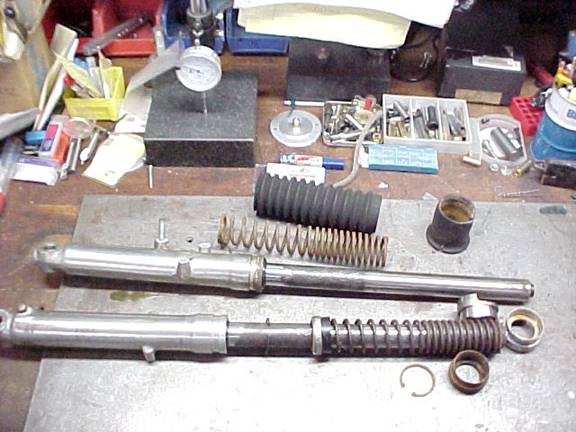 Forks ready for new seal kits. The on-line ordering systems on the internet are awesome! They have detailed exploded views of all sections of the bike so that you can pick what you want and even have the parts delivered to your home! http://www.shawmuthills.com/fiche_select.asp |
 Electric motor kit received (3-8-07) I purchased my Electric Motor drive system from http://www.electricmotorsport.com/. I figured, they build electric motorcycles so they should know what works and what doesn't. They gave great service and they have great prices! I picked up the extra items I needed to get the kit running (diodes, 6 amp fuses and fuse holder) at Radio Shack. The pre-charge resistor was not carried by Radio Shack 470 ohm 10W. I see that you can get these items from Electric MotorSports now when you order your kit. I downloaded wiring diagrams and the user manual for the controller from the Alltrax website (www.alltraxinc.com). I also downloaded the software for communicating with the controller via my laptop from the Alltrax site. This software worked good, but I've since found that it's just as easy to add external resistors to the throttle circuit to limit max current and to give variable control of the controller while riding the bike (so I don't feel that spending extra money for a programmable controller is always necessary). But, make sure to set the maxium current output from the controller BEFORE you take your first ride. Otherwise, you could fry your motor on the very first run (burning up a brand new motor, can be a very expensive learning opportunity). My biggest design oversight was that the Perm motor is designed to run Clockwise which I didn't realize until I had the motor in hand. My bike design requires it to run counterclockwise. The Perm factory said the following when I questioned them on this --Dear Mr. Schultz,up to 48 V yes without any Problem. Above it should run clockwise, with 72 V it must run clockwise. Problem is overheating, brushlife, risk of motor damage. Mit freundlichen Gr��en / best regards Thomas Janz, Gesch�ftsleitung/Managing Director, Perm Motor GmbH"-- If I had been building a 72 V system I would have been disappointed. There are a few ways around the CW rotation of a Perm on a motorcycle. You could start out with a bike with a right hand drive like a bicycle or a Harley. Another approach is to reverse the rear wheel, but this normally requires reconfiguring the brakes and kickstand. Another is to mount the motor on the outside of the rear forks El Ninja style (http://www.evdeals.com/BidwellSecrets.htm). Another is to use a jackshaft to transfer CW rotation of motor to other side of bike going CCW for the chain. The Electric Moto Blade has the motor output on the same side but shows gearing and pivot point advantages of using a jackshaft (http://www.electricmoto.com/) A second oversight in my design is that I thought I could pull more juice out of my batteries. For instance, I thought I could get 20amp hours out of a 20 amp hour battery. Battery amp-hour ratings are generally listed as the amount they can deliver over the course of 20 hours, not during the course of a 1 hour ride. Also, fully discharging a lead acid battery dramatically reduces the lifespan of the battery (the total number of charge/discharge cycles). This data is clearly shown on the battery spec sheets at B&B battery's website, but I ignored it. This lead to me double the size of my batteries after the bike was built. Another note, the cost of battery replacement is probably about equal to the cost of electricity to charge the battery over the batteries lifespan. |
 Here was my concept for how I thought I might mount everything to the bike. (3-9-07) I was going to engrave my company logo on the mounting bracket when I had the plate in the CNC, but never did... I would have liked to mount the batteries a few inches lower, but it was more convenient to sit them on top of the motor support bracket. |
 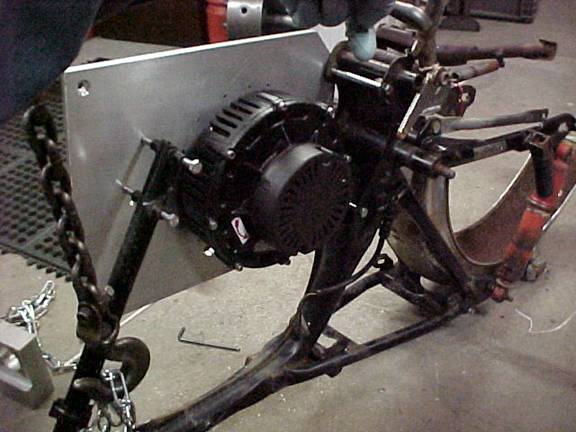 Roughing in the Motor Support (Frame is upside down on the floor) 3-18-07 At this point, it is normally time to start sanding and painting the frame. But, I decided to not worry about cosmetics and focus only on function. Since I had no idea how well the bike would perform, I decided to put the bike together and test drive it. If it worked good, I decided I would take it back apart, detail and paint it. If it didn't work good, I would strip off the drive system and put it into a different platform. I've made this mistake several times now. When I have something stripped down to the frame, I'm beginning to think I should at least take a few minutes to clean it off and give it a quick shot of paint. Later, I can always strip it down and paint it right. I like tinkering with my bike so, I'll probably never be done working on it enough to take it apart just to make it pretty. I care more about function than looks. And if I make it pretty, I'll be always cleaning it or trying not to scratch it and worried about someone stealing it. Better to look like a piece of crap and run good with no worries, than to be worth a million bucks and be scared to ride it. |
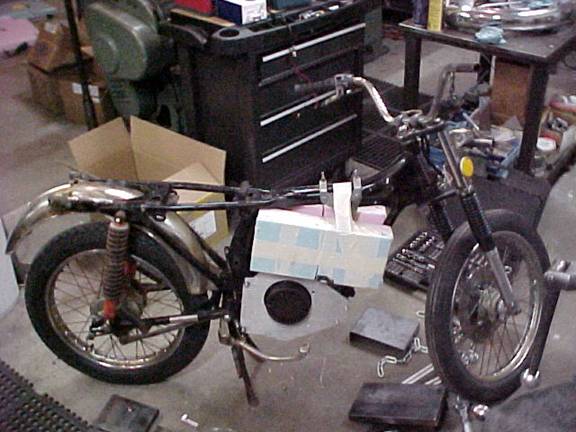 Back on Two Wheels and Rolling on new bearings 3-20-07 I mocked up the batteries in Styrofoam to help with the placement. |
 Battery Box in Place (3-22-07) |
 Controller, contactor, and foot pegs installed (3-24-07) |
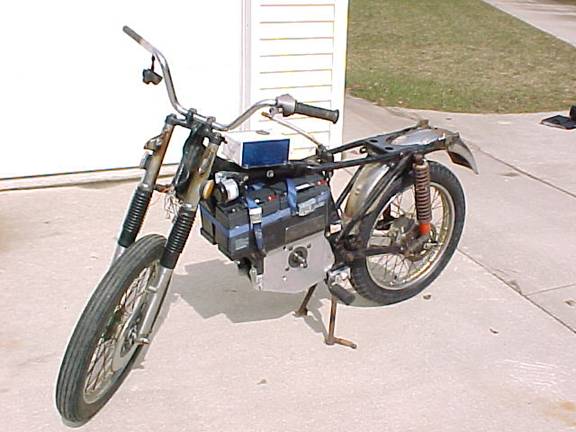
 (3-26-07 Mid-night) First Powered Test Ride in my driveway. Bike is FAST and QUIET! Notice lack of front brakes. The next day, I decided to take it to a longer stretch of road. I loaded it into the back of my van and nearly killed myself and the bike. The bike took off, spinning the rear wheel, throwing the ramp out from under the bike, the bike did a burn out across the threashold and went zooming into the van. Holy #$%^&*! Note to self: throttle must be tamed down for loading and ramp securely fastened to the van! You can see my motor is a direct drive to rear wheel via #40 chain. Chain purchased in bulk lengths costs much less than at Honda dealer. To find out what chain is on your bike, visit Sprocket Specialists ((http://www.sprocketspecialists.com/) they have great prices and selection with a database of sprockets needed for just about any bike. Some good information about motorcycle chain pitch and sizing can be found at http://www.gizmology.net/sprockets.htm. Here is a sample from that page: 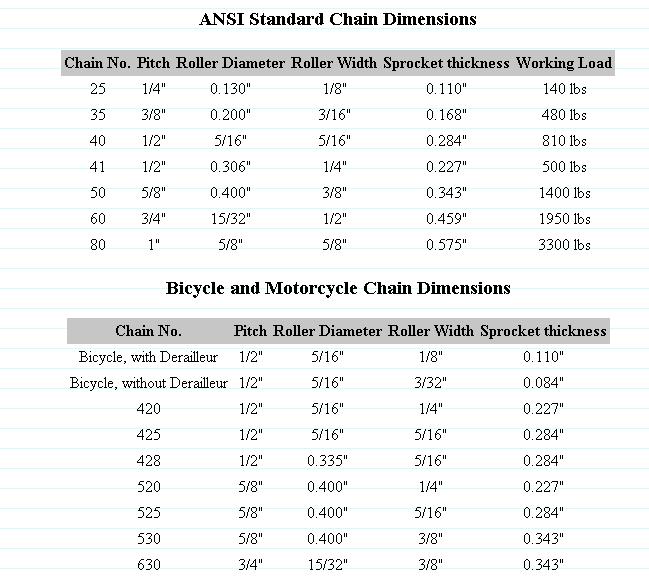
Motorcycle chain and sprockets can also be purchased at http://www.azusaeng.com/chain/mcyclchn.html. Bicycle and scooter chain-rings and sprockets can be purchased at http://www.electricscooterparts.com/sprockets.html. Here is a sample from that page: 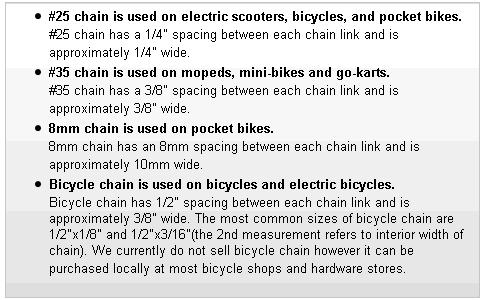
|
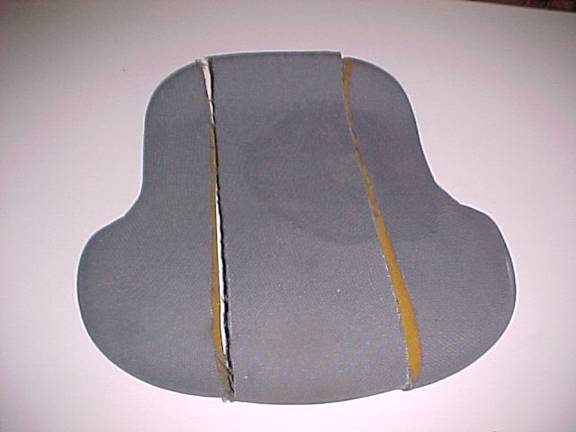 To make the seat, I cut out the center of an old office chair seat and bolted the remaining parts to an aluminum base plate. |
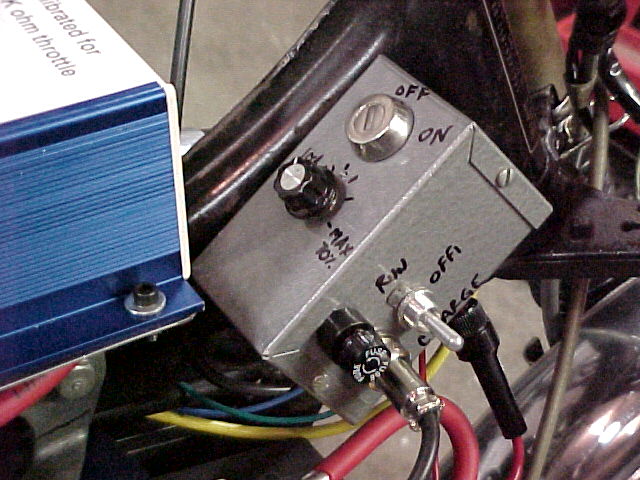 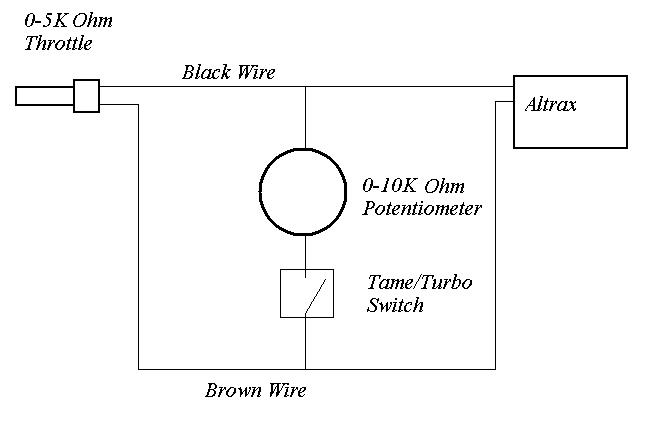 I added a 10k potentiometer in parallel with my Magnura 0-5K twist grip to give manual control over throttle response. This makes the bike easier to load into my van (with ramps) and makes it safer to creep around in tight spaces and in crowds. Also, it provides good control over my hot rodding! In TURBO mode, the throttle works normally. In TAME mode, the 0-10K potentiometer is wired in parallel with the 0-5K throttle giving the ability to infinitely override the maximum throttle from 0-3333 Ohms. |
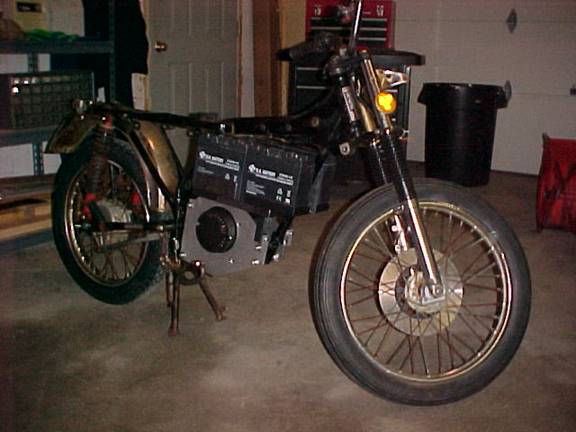
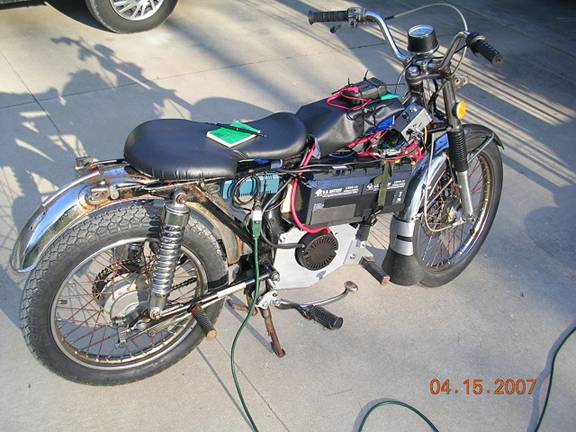 (Status as of 4/15/07) Motorcycle as it is being ridden to benchmark performance. Note the added highway pegs, front fender mud flap (secured with duct tape) and new chrome shocks. I also determined that my max speed of 45mph is being limited by gear ratio. |
|
(Next Chapter - Burning Rubber and Silicon) |
|
This webpage was written by Kraig D. Schultz. Copyright 2007-2010, Schultz Engineering, LLC |